Hello! Thank you for visiting my blog. In this post, I’m explaining about how to create a VM in Vmware vSphere.
Creating VM in VMware Vsphere
To begin the VM creation process, first login to the vsphere client and browse the Datastore. Within the datastore, browse the folder where you store your ISO images and upload your ISO images to it. After the upload is completed, create a new virtual machine by simply entering Ctrl + N or right clicking on the suitable host or resource pool. This will launch a Create New Virtual Machine wizard.

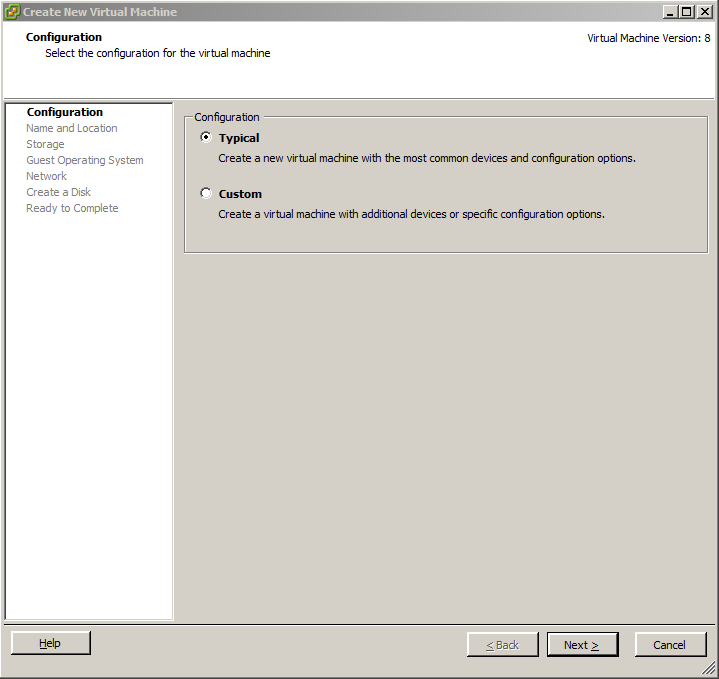
Choose Typical option and click Next. Custom configuration is useful when we have specific requirements for our new VM. For example, sometimes we need to create a virtual machine using existing virtual machine disk (VMDK) or need a VM to have very particular specifications. Selecting Custom option allows us to fulfill these requirements.

Enter the virtual machine’s name and click Next.

Choose the Storage from the Data-Store selection menu and click Next.

Choose the Guest OS type as Windows or Linux or Other. In my case, I’m choosing Linux and version as CentOS 4/5/6 (64 bit). Click Next.

I’m adding two network NICs to this system because I need to connect my system to my company’s network via VM Network and to my hotspot network via Wireless Test. Since I’ve got two networks or two VLANs, I need to have the switch-ports connecting to my Vmware server to be in trunk mode. If you haven’t got these networks already configured in your Vmware server, you can add a new network by following this post:
After the networking is ready, we can continue the Virtual Machine creation process.

I then specified the disk space for my CentOS system as 5 GB and selected Thin Provisioning. You can enter values according to your requirement or preference.

Check Edit the virtual machine settings before completion button and hit Continue. A Virtual Machine Properties window pops up, where we can customize the properties of our guest VM. Here, we can remove any unnecessary devices like Floppy Drive or add new necessary device. We can also change values for Memory, CPU, and so on. Before we finish it, we need to add our ISO image to the CD drive so that the guest VM can boot from it.

To mount an ISO, click on New CD/DVD, select Datastore ISO File option and browse the CentOS ISO image from Datastore. Don’t forget to check Connect at power on button.

In order to boot our VM from CD-ROM, we need to modify BIOS boot order. To do that, we can go to Options tab, then to Boot Options inside Advanced, and check The next time the virtual machine boots, force entry into the BIOS setup screen so that we can enter into BIOS setup when the VM boots up and modify boot order to put CD-ROM as first. Click Finish.
Now that I’ve got my guest VM configured, let’s start it and begin the installation. After starting the VM, navigate to Console. It should open up the BIOS setup screen as configured earlier.

In the Boot menu, I brought the CD ROM Drive option to the top using (+) key. I exited saving changes. This should now boot up the guest VM from CD-ROM drive.
I hope you found it informative. Please let me know in the below Comments section if you’ve any question or suggestion for me.
Leave a Reply